Setting Up Custom Material Instances (Killing Floor 2)
Introduction
Creating a custom Material Instance (MIC) in the Killing Floor 2 editor is almost exactly the same as in the UDK.
In this instance we will be saving our custom MIC in our custom map package instead of creating a package outside of our map.
Currently user made master materials (parent materials) are not supported in the Killing Floor 2 SDK.
Step 1
Save your custom map in : C:\Users\”Your Name”\Documents\My Games\KillingFloor2\KFGame\Unpublished\BrewedPC
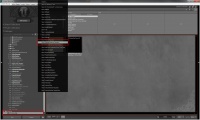
In the KF2 ED locate the external package that was created for your map. Right Click in the content browser and choose New Material Instance Constant.
Step 2
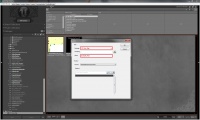
In the pop up dialog, name your MIC.
Step 3
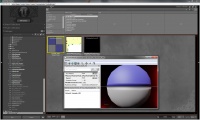
Your new MIC should show up in your maps package.
Step 4
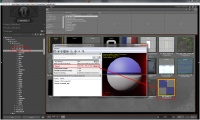
Navigate to the Env_Mat_Lib package in the content browser. Here is where all the environment master materials reside. First have your MIC open and then select the SDK_Simple_PM (Parent Material), then hit the green arrow next to where it says parent in your MIC.
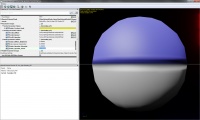
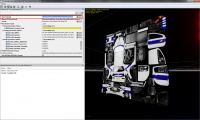
Your custom MIC now has a parent material. You can now start plugging in your custom textures. Navigate to your textures and use the same method of selecting an item in the content browser then clicking the green arrow next to the field you want to fill in the MIC.
Parameters
The SDK_Simple_PM has a very limited set of options but will be good for most basic applications. Check all the boxes to the left that you want to change, then adjust.
The only parameter in this material that is not self explanatory is the Scalar_Texture_Scale. This is a 3 Vector Constant but it only uses R and G to control the tiling of your texture. Scale R and G together for uniform tiling. Scale R and G different values for non-uniform tiling. Also It is good to stick to whole numbers so the seam always lines up with the modular kit.
The Scalar_Specular_Power also acts as the type of reflection you receive when Realtime Reflections is enabled in the options menu. You can view realtime reflections in the editor if the option is enabled in game. A low specular power (10 or so) will produce a blurry reflection. Any value above 50 will produce mirror reflection.
Step 5
The final step is adding your Physical Material. The Physical Material is what determines what hit effects and decals to play when the object is shot or what sound to play when the player or enemy walks on the surface.
Copy and paste one of these physical materials into the physical material slot.
Physical Material List
- PhysicalMaterial'ENV_Surface_Types_PHYS.Asphalt_PM'
- PhysicalMaterial'ENV_Surface_Types_PHYS.Basket_PM'
- PhysicalMaterial'ENV_Surface_Types_PHYS.Books_PM'
- PhysicalMaterial'ENV_Surface_Types_PHYS.Bread_PM'
- PhysicalMaterial'ENV_Surface_Types_PHYS.Can_PM'
- PhysicalMaterial'ENV_Surface_Types_PHYS.CanFull_PM'
- PhysicalMaterial'ENV_Surface_Types_PHYS.CardBoardBox_PM'
- PhysicalMaterial'ENV_Surface_Types_PHYS.CastIron_PM'
- PhysicalMaterial'ENV_Surface_Types_PHYS.Cloth_PM'
- PhysicalMaterial'ENV_Surface_Types_PHYS.Concrete_PM'
- PhysicalMaterial'ENV_Surface_Types_PHYS.Dust_PM'
- PhysicalMaterial'ENV_Surface_Types_PHYS.Flesh_PM'
- PhysicalMaterial'ENV_Surface_Types_PHYS.FruitVeggies_PM'
- PhysicalMaterial'ENV_Surface_Types_PHYS.Glass_PM'
- PhysicalMaterial'ENV_Surface_Types_PHYS.Grass_PM'
- PhysicalMaterial'ENV_Surface_Types_PHYS.Gravel_PM'
- PhysicalMaterial'ENV_Surface_Types_PHYS.HollowMetal_PM'
- PhysicalMaterial'ENV_Surface_Types_PHYS.HollowWood_PM'
- PhysicalMaterial'ENV_Surface_Types_PHYS.Ice_PM'
- PhysicalMaterial'ENV_Surface_Types_PHYS.Metal_PM'
- PhysicalMaterial'ENV_Surface_Types_PHYS.MetalArmor_PM'
- PhysicalMaterial'ENV_Surface_Types_PHYS.Mud_PM'
- PhysicalMaterial'ENV_Surface_Types_PHYS.Paper_PM'
- PhysicalMaterial'ENV_Surface_Types_PHYS.PictureFrame_PM'
- PhysicalMaterial'ENV_Surface_Types_PHYS.Plant_PM'
- PhysicalMaterial'ENV_Surface_Types_PHYS.Plaster_PM'
- PhysicalMaterial'ENV_Surface_Types_PHYS.Poop_PM'
- PhysicalMaterial'ENV_Surface_Types_PHYS.RedBrick_PM'
- PhysicalMaterial'ENV_Surface_Types_PHYS.Rock_PM'
- PhysicalMaterial'ENV_Surface_Types_PHYS.Rubber_PM'
- PhysicalMaterial'ENV_Surface_Types_PHYS.SandBags_PM'
- PhysicalMaterial'ENV_Surface_Types_PHYS.Silverwear_PM'
- PhysicalMaterial'ENV_Surface_Types_PHYS.SmWoodFruniture_PM'
- PhysicalMaterial'ENV_Surface_Types_PHYS.Snow_PM'
- PhysicalMaterial'ENV_Surface_Types_PHYS.Water_PM'
- PhysicalMaterial'ENV_Surface_Types_PHYS.WhiteBrick_PM'
- PhysicalMaterial'ENV_Surface_Types_PHYS.Wood_PM'
And that’s it, save your map and you’re good to go.
Notes
We use a lot of different master materials when creating different effects in KF2. If you would like your MIC to have more controls, I would advise choosing a like asset in one of our maps and find the master associated with that asset. Then choose that master material as your MIC’s parent.
Most of the environment props in KF2 use a version of Env_Basic_Metal_PM. This master material has a good set of controls that can support almost any type of asset. Just remember to change the Physical Material to match your assets surface type.
