The Tragic Kingdom: Difference between revisions
m (1 revision imported) |
mNo edit summary |
||
| (2 intermediate revisions by the same user not shown) | |||
| Line 1: | Line 1: | ||
[[Category:KF2]] | |||
{{KF2MapInfo | {{KF2MapInfo | ||
| Name=The Tragic Kingdom | | Name=The Tragic Kingdom | ||
| Line 5: | Line 6: | ||
| Author= | | Author= | ||
| TraderLocations=5 | | TraderLocations=5 | ||
| Collectibles="Pukey the Clown" | | Collectibles="Pukey the Clown" Doll (25) | ||
| | | | ||
| WeaponSpawns=16 | | WeaponSpawns=16 | ||
| Line 23: | Line 24: | ||
}} | }} | ||
The '''Tragic Kingdom''' is a Killing Floor 2 map. Is was added in the game as a part of [[ | The '''Tragic Kingdom''' is a [[Killing Floor 2]] map. Is was added in the game as a part of [[Updates (Killing Floor 2)#Summer Sideshow .282017.29|Summer Sideshow 2017]] update. It is the first official map to add player-triggered environmental traps and interactive objectives in the game, such as mini-games, cage barriers and movable objects that do damage to players and ZEDs. As a part of seasonal event the Tragic Kingdom had also featured the optional objectives, required to obtain time-limited even-themed player outfit. | ||
==Description== | ==Description== | ||
Experience the thrills and chills of the Tragic Kingdom Map, centerpiece of our Summer Sideshow Seasonal Event! Test your luck and skill at games like Dunk the Bloat and Pop the Clot! Scream on the terrifying Queen of Blades or experience the hurtling terror of Pound Mountain! | ''"Experience the thrills and chills of the Tragic Kingdom Map, centerpiece of our Summer Sideshow Seasonal Event! Test your luck and skill at games like Dunk the Bloat and Pop the Clot! Scream on the terrifying Queen of Blades or experience the hurtling terror of Pound Mountain!"'' | ||
==Objectives== | ==Objectives== | ||
| Line 33: | Line 34: | ||
The Tragic Kingdom featuring optional seasonal (time-limited) objectives. Upon completion of all of them players were granted with the event-themed Sideshow Hazmat Suit outfit. The objectives: | The Tragic Kingdom featuring optional seasonal (time-limited) objectives. Upon completion of all of them players were granted with the event-themed Sideshow Hazmat Suit outfit. The objectives: | ||
* Power up the Generator In The Tragic Kingdom. | *Power up the Generator In The Tragic Kingdom. | ||
* Pop the Clot in The Tragic Kingdom. | *Pop the Clot in The Tragic Kingdom. | ||
* Dunk the Bloat in The Tragic Kingdom. | *Dunk the Bloat in The Tragic Kingdom. | ||
* Dosh Toss in The Tragic Kingdom. | *Dosh Toss in The Tragic Kingdom. | ||
* Win a match on Hard or higher In The Tragic Kingdom. | *Win a match on Hard or higher In The Tragic Kingdom. | ||
==Traps== | ==Traps== | ||
| Line 43: | Line 44: | ||
All interactive objects such as traps and mini-games in Tragic Kingdom are power-dependant. To use these, players firstly have to turn on the power generator. The generator lasts for 300 seconds (5 minutes). Every 10 seconds it can be reset back to its 5 minutes timer. | All interactive objects such as traps and mini-games in Tragic Kingdom are power-dependant. To use these, players firstly have to turn on the power generator. The generator lasts for 300 seconds (5 minutes). Every 10 seconds it can be reset back to its 5 minutes timer. | ||
Merry-go-round / carousel does 7 points of damage within 1s intervals and always knocks down ZEDs. Carousel does NOT block weapon bullets / projectiles. It takes 4 seconds to complete a circle (90 degrees per second). Neither player nor the ZED's resistances do matter, as it always same amount of the damage per hit. | * Merry-go-round / carousel does 7 points of damage within 1s intervals and always knocks down ZEDs. Carousel does NOT block weapon bullets / projectiles. It takes 4 seconds to complete a circle (90 degrees per second). Neither player nor the ZED's resistances do matter, as it always same amount of the damage per hit. | ||
Siren's Tunnel Of Love / cave has two electric traps that do 1 point of EMP damage within 1s interval (100 EMP power per hit). These traps do not damage players. | * Siren's Tunnel Of Love / cave has two electric traps that do 1 point of EMP damage within 1s interval (100 EMP power per hit). These traps do not damage players. | ||
Dr. Infernum's Pyrotechnic Emporium / middle area has two cage traps that do 20 points of fire damage within 3s intervals. It takes 1.5s for them to complete the descend / ascend animation. | * Dr. Infernum's Pyrotechnic Emporium / middle area has two cage traps that do 20 points of fire damage within 3s intervals. It takes 1.5s for them to complete the descend / ascend animation. | ||
Backdoor cage trap has 2s delay before it starts to descend. It takes 5.5s to complete the descend / ascend animation and approximately 9.5s to retain its position. | * Backdoor cage trap has 2s delay before it starts to descend. It takes 5.5s to complete the descend / ascend animation and approximately 9.5s to retain its position. | ||
Rollercoaster trap does 14 points of damage within 1s intervals, knocks down ZEDs and has a lot of push force. It takes 0.75s to play movement animation and 4 seconds for Rollercoaster to return back to its original location. | * Rollercoaster trap does 14 points of damage within 1s intervals, knocks down ZEDs and has a lot of push force. It takes 0.75s to play movement animation and 4 seconds for Rollercoaster to return back to its original location. | ||
==Gallery== | ==Gallery== | ||
<gallery> | <gallery mode="packed" heights="275"> | ||
File: | File:SS2017 Dunk The Bloat.jpg|alt=Dunk The Bloat|Dunk The Bloat | ||
File: | File:SS2017 Feed The Pound.jpg|alt=Feed The Pound|Feed The Pound | ||
File: | File:SS2017 Pop The Clot.jpg|alt=Pop The Clot|Pop The Clot | ||
File: | File:SS2017 Pyrotechnic Emporium.jpg|alt=Dr. Infernum's Pyrotechnic Emporium|Dr. Infernum's Pyrotechnic Emporium | ||
</gallery> | </gallery> | ||
{{KF2NavBox}} | {{KF2NavBox}} | ||
Latest revision as of 03:53, 9 November 2019
| Killing Floor 2 Tripwire Official map | ||
The Tragic Kingdom | ||

| ||
General Information | ||
| Author | Tripwire Interactive | |
| Trader Locations | 5 | |
| Collectibles | "Pukey the Clown" Doll (25) | |
Map Information | ||
| Weapon Spawns | 16 | |
| Ammo Spawns | 20 | |
| Player Spawns | 24 | |
| Zed Spawns (Boss Spawns) | 68 (5) | |
Related Achievements | ||
The Tragic Kingdom is a Killing Floor 2 map. Is was added in the game as a part of Summer Sideshow 2017 update. It is the first official map to add player-triggered environmental traps and interactive objectives in the game, such as mini-games, cage barriers and movable objects that do damage to players and ZEDs. As a part of seasonal event the Tragic Kingdom had also featured the optional objectives, required to obtain time-limited even-themed player outfit.
Description
"Experience the thrills and chills of the Tragic Kingdom Map, centerpiece of our Summer Sideshow Seasonal Event! Test your luck and skill at games like Dunk the Bloat and Pop the Clot! Scream on the terrifying Queen of Blades or experience the hurtling terror of Pound Mountain!"
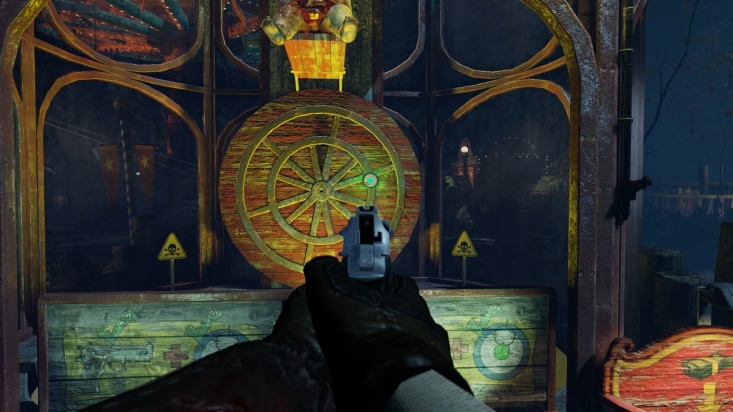
Objectives
The Tragic Kingdom featuring optional seasonal (time-limited) objectives. Upon completion of all of them players were granted with the event-themed Sideshow Hazmat Suit outfit. The objectives:
- Power up the Generator In The Tragic Kingdom.
- Pop the Clot in The Tragic Kingdom.
- Dunk the Bloat in The Tragic Kingdom.
- Dosh Toss in The Tragic Kingdom.
- Win a match on Hard or higher In The Tragic Kingdom.
Traps
All interactive objects such as traps and mini-games in Tragic Kingdom are power-dependant. To use these, players firstly have to turn on the power generator. The generator lasts for 300 seconds (5 minutes). Every 10 seconds it can be reset back to its 5 minutes timer.
- Merry-go-round / carousel does 7 points of damage within 1s intervals and always knocks down ZEDs. Carousel does NOT block weapon bullets / projectiles. It takes 4 seconds to complete a circle (90 degrees per second). Neither player nor the ZED's resistances do matter, as it always same amount of the damage per hit.
- Siren's Tunnel Of Love / cave has two electric traps that do 1 point of EMP damage within 1s interval (100 EMP power per hit). These traps do not damage players.
- Dr. Infernum's Pyrotechnic Emporium / middle area has two cage traps that do 20 points of fire damage within 3s intervals. It takes 1.5s for them to complete the descend / ascend animation.
- Backdoor cage trap has 2s delay before it starts to descend. It takes 5.5s to complete the descend / ascend animation and approximately 9.5s to retain its position.
- Rollercoaster trap does 14 points of damage within 1s intervals, knocks down ZEDs and has a lot of push force. It takes 0.75s to play movement animation and 4 seconds for Rollercoaster to return back to its original location.
Gallery
-
Dunk The Bloat
-
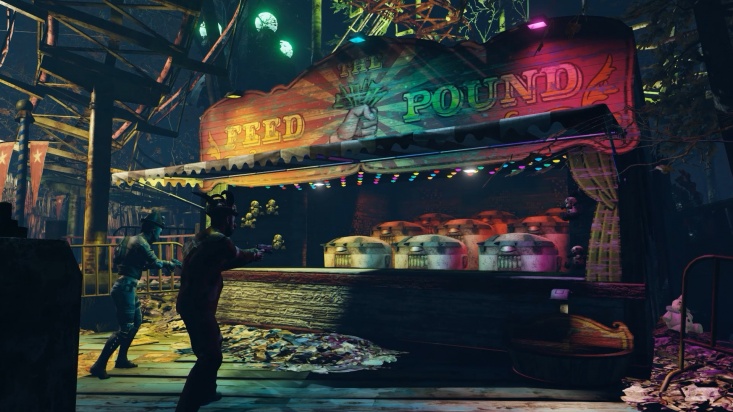
Feed The Pound
-
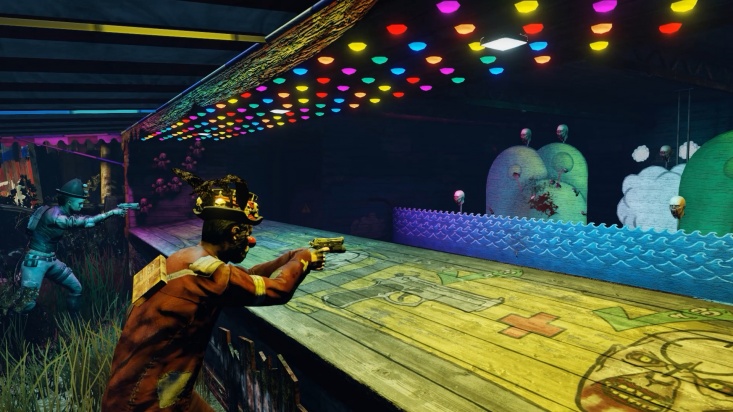
Pop The Clot
-
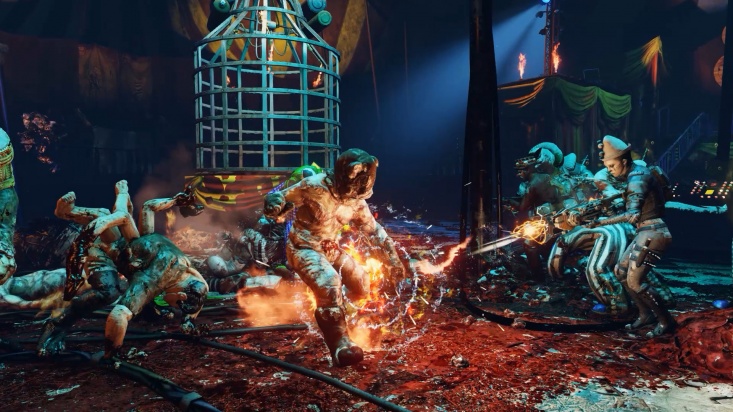
Dr. Infernum's Pyrotechnic Emporium


